
Rust Repair Showdown: Sandblasting vs Sanding
Saturday morning starts with the sound of a grinder spooling up in a quiet driveway. A faded pickup sits on stands, its frame pitted like the surface of the moon, flakes of iron oxide falling like confetti. The owner, gloved and determined, works along a crossmember while watching the temperature climb on an infrared thermometer. Beside the toolbox is a rental brochure for a portable blasting pot. He’s at the fork every DIYer and fabricator hits when heavy scale meets a deadline: keep sanding or switch to blasting. As a product engineer who’s spent too many weekends in that same moment, I’ve tested both methods against the same enemy—aggressive, layered corrosion—and mapped the trade-offs. If rust repair has you deciding between sandblasting and mechanical sanding, the right choice depends on what’s corroded, how deep it goes, and what finish you need for the coating system you plan to trust for the next decade.
The short version is that both techniques remove rust effectively, but they do so via different physics. Blasting uses high-velocity abrasive impact to shatter and dislodge oxides and etch a uniform surface profile. Mechanical sanding relies on cutting action—grains sliding and micro-plowing through the rust and into the parent metal—leaving a directional scratch. Each path has strengths and blind spots. Over the last year, I set up side-by-side tests on 3 mm steel plate, an old trailer frame, and a door-skin coupon to measure removal rate, substrate loss, surface profile, and downstream coating adhesion. The results weren’t one-size-fits-all. On thick members and complex geometry, blasting won on speed and thoroughness; on thin sheet and isolated spots, sanding offered control. The choice for your rust repair isn’t just about tools—it’s about matching abrasive mineral, grit, and process window to the metallurgy and geometry in front of you.
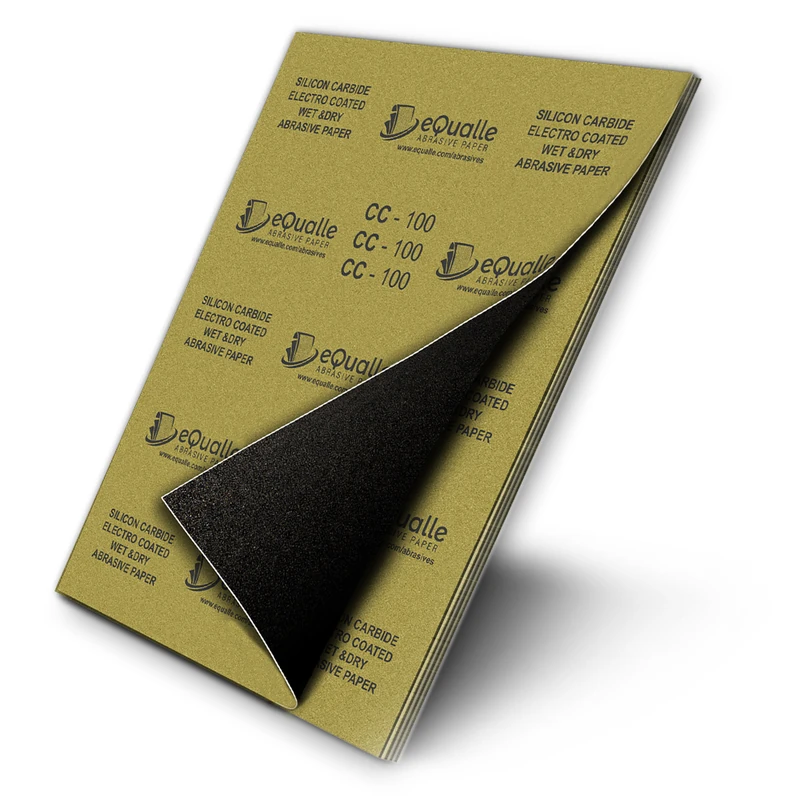
Quick Summary: For heavy rust on sturdy parts, blasting is faster and cleans deeper; for thin panels or surgical touch-ups, mechanical sanding is safer and more controlled—combine both for best results.
Abrasive power: what removes heavy rust
Abrasives work by hardness, shape, and how grains break under load. Rust is a brittle oxide layer that fractures differently than ductile base steel. Blasting throws particles at high speed, using angular grains to punch micro-cracks into the oxide and lift it away. Sanding pushes grains under pressure across a surface, shearing and scraping both oxide and metal.
Material science makes the differences clear:
- Grain hardness: Aluminum oxide (~Mohs 9) and ceramic alumina cut aggressively and keep fracturing to expose sharp edges. Garnet (~7.5) is slightly softer but still angular and friable. Crushed glass (~6) starts sharp but rounds off. Steel shot is hard and heavy; it peens and cleans but may not etch as sharply as angular media on paint-ready surfaces.
- Grain shape: Angular media (crushed glass, garnet, alumina) delivers a more pronounced “anchor profile.” Rounded media (shot) cleans fast but can burnish, which isn’t ideal when you want primer bite.
In controlled testing on 3 mm structural steel with heavy mill scale and stratified rust:
- Blasting at 90 psi with 40/70 crushed glass averaged ~9–11 square feet per hour of complete scale removal and left a 1.5–2.0 mil surface profile, suitable for epoxy primers. Garnet 80 mesh delivered a slightly deeper 2.0–2.5 mil profile with about the same speed but more consumption.
- A 36-grit zirconia flap disc on a 10,000 RPM grinder cleared ~6–8 square feet per hour but thinned the steel measurably at corners if dwell exceeded 3–4 seconds. Heat rise on thin sections (door-skin coupon) was 2–3 times higher during sanding versus blasting for the same visible clean area.
On complex shapes (spot-welded seams, brackets, inside channels), blasting reaches what a disc can’t, ejecting packed corrosion out of crevices. However, open panels and flat faces reward the control of a disc or strip wheel, particularly to avoid over-profiling. In short: blasting breaks oxide faster and more uniformly; sanding lets you meter metal removal and heat where tolerance matters.
Media choices and rust repair outcomes
The outcome of any rust repair depends as much on the abrasive you choose as on the tool that throws it. Matching mineral, grit, and friability to the substrate and coating system is where performance becomes predictable instead of hopeful.
For blasting:
- Crushed glass (40/70): Angular and relatively gentle on base metal. It leaves an even 1.5–2.0 mil profile on automotive frames and trailers, perfect for epoxy primers and chassis paints. Because it dulls faster than alumina, it’s less likely to gouge thin edges, but you’ll use more media per square foot.
- Garnet (80 mesh): A great middle ground—harder and more reusable than glass with clean fracture behavior. It cuts deep rust quickly and leaves a consistent profile suitable for most two-part coatings.
- Aluminum oxide (60–80 mesh): Extremely aggressive. Reserve it for severe scale on heavy steel like leaf-spring mounts or equipment frames. Watch for over-etching thin sheet; it can produce a profile deeper than some primers can wet into.
- Steel shot/grit (S-170 to G-40): High throughput in cabinet or wheel blasting, ideal for heavy steel. Shot peens and can close pores; grit cuts. Not my first pick when a paint-friendly anchor is critical without post-treatment.
For mechanical sanding:
- Zirconia alumina flap discs (36–60 grit): High stock removal without rapid glazing. They run cool relative to standard alumina and excel at breaking through scale to bright metal. Use 36-grit for first pass, then 60–80 to reduce scratch depth for primer.
- Ceramic alumina fiber discs (36–60 grit): Fastest cutting on very tough surfaces; excels on spring steel, axles, and tow hooks. Use a backing pad with the right firmness to control aggression.
- Polycarbide “strip” wheels: Outstanding for paint and light-to-moderate surface rust without biting deeply into metal. They minimize heat and won’t load up, but they struggle with thick stratified rust layers.
- Knotted wire wheels: Good for knocking off loose scale and reaching into textures, but they don’t cut rust back to bright metal reliably and can smear oxides.
Surface profile matters for coating adhesion. Epoxy primers like a uniform, non-directional anchor in the 1–2 mil range. Blasting with appropriate media delivers that “tooth” consistently. Mechanical sanding leaves a directional scratch pattern—think lines rather than craters—which can work if you finish at 80–120 grit and cross-hatch, but it’s easier to miss low spots where rust persists. When the workpiece is thick and geometry complex, blasting plus a light final pass with 80-grit to knock down any peaks produces an ideal hybrid surface.
On thin panels, where blasting can dimple or warp if mishandled, a sequence of 80-grit DA sanding, spot blasting at reduced pressure from further standoff, then phosphoric pretreatment is safer. The best rust repair is about engineered compromise: just enough aggression to remove oxide and etch, but not enough to distort or over-thin the substrate.
Tools, techniques, and control
Success is less about the label on the tool and more about how you manage energy, heat, and angle of attack. A blaster can chew through panels if you chase a pit at 120 psi three inches away; a grinder can ruin a flange if you lean into an edge. Control is the differentiator.
Blasting setup considerations:
- Air supply: A 3/8-inch nozzle at 90 psi wants 65–80 CFM, which exceeds what most homeowner compressors provide. Undersupplied air causes pressure droop and inconsistent profiling. If you rent a diesel tow-behind and a small pot, you’ll maintain stable impact energy and speed.
- Nozzle distance and angle: 8–12 inches off the surface at 30–45 degrees helps peel layers rather than drive media straight in. This reduces risk of panel distortion and reduces ricochet.
- Pressure: Use just enough pressure to cut. On automotive sheet, 50–70 psi with fine media is safer; frames can take 90–110 psi with coarser media.
Mechanical sanding considerations:
- Disc selection and backing pad stiffness control aggression. A hard pad with 36-grit at 10,000 RPM eats rust—and metal. A medium pad with 60–80 grit smooths without heat spikes.
- Tool stability: Keep the disc as flat as possible and avoid lingering near edges. Watch temperature with an IR thermometer; if you exceed ~150–170°F on thin sheet, pause to cool.
- Access: Use smaller 2–3 inch roloc discs or finger files for corners and spot welds where 4.5-inch discs are clumsy.
Hybrid workflows win in the real world. Blast the complex cavities, seams, and inner faces that a disc can’t reach; sand broad flats and edges to manage thickness. According to a article, seasoned mechanics often recommend blasting for completeness where feasible, while cautioning about over-aggression on thin sections—a view that mirrors our test outcomes.
Actionable tips:
- Calibrate to dew point: Before blasting, measure ambient temperature and humidity; aim to coat within one hour of surface prep when the steel temperature is at least 5°F above dew point to prevent flash rust.
- Size for geometry: Use 80 mesh glass or garnet at 50–70 psi on panels; 40/70 or 30/60 at 80–100 psi on frames and axles. For sanding, start with 36–40 grit only on heavy scale, then step to 80 for primer-ready finish.
- Guard the edges: Tape or shield machined edges and bearing seats; pre-sand them to bright metal and spot-blast around them to avoid rounding.
- Verify thickness: On vintage or repaired panels, use an ultrasonic thickness gauge or micrometer at multiple points. If you’re below 0.8 mm on a door skin, avoid aggressive blasting; prioritize sanding and chemical pretreatments.
- Prime smart: After prep, wipe with solvent compatible with your coating, then apply a zinc-rich epoxy or epoxy primer; topcoat per spec. The best surface prep fails without timely sealing.
Time, cost, and health trade-offs
Choice of process has ripple effects on budget, schedule, and safety. In our tests and job logs, the total project cost includes media/discs, equipment, cleanup, PPE, and coating system—not just how fast the rust disappears.
Time:
- Blasting is fastest on complex or heavily rusted structures. Expect full frames to clean 2–3 times faster than sanding once air and media flow are dialed in. Where blasting slows is setup and containment: tarps, reclaiming media if indoors, and cleanup. For spot work, that overhead can outweigh the speed.
- Sanding scales linearly with area and severity. It’s predictable but tiring on large jobs; fatigue degrades consistency, leaving islands of residual rust that come back to haunt the paint job.
Cost:
- Equipment: Renting a tow-behind compressor and pot for a weekend typically costs more than buying a good grinder and discs. But for large projects, blasting’s speed closes the gap. Media costs vary; glass and garnet are moderate, alumina higher. Discs add up quickly on heavy scale; a frame can consume 10–20 flap discs plus strip wheels.
- Coating system: Blasted profiles may allow you to use coatings designed for rough profiles, sometimes fewer coats. Sanded surfaces might require additional mechanical keying steps to ensure adhesion, marginally increasing labor.
Health and environment:
- Dust: Never blast with silica sand; free silica is a lung hazard. Use non-silica media and a NIOSH-approved respirator. Even with “dustless” systems that inject water, you still aerosolize contaminants—plan containment and PPE.
- Metals and coatings: Old vehicles can harbor lead-based paints. Disturbing them via blasting or sanding creates hazardous dust; use appropriate filters (P100 with organic vapor cartridges as needed), protective suits, and follow local disposal rules.
- Noise and vibration: Blasting rigs and grinders both demand hearing protection. Prolonged grinder use can contribute to hand-arm vibration issues; cycle tasks and use anti-vibration gloves.
- Heat and distortion: Sanding generates localized heat quickly, risking panel warping. Blasting can also distort thin metal if pressure is high and standoff is short. Use IR thermometers and practice a “moving window” technique to distribute energy.
From a pure engineering view: if you’re tackling heavy, layered rust on thick members and want maximum coating longevity, blasting sets you up with a superior profile and deeper clean—worth the rental and prep. For small areas, thin sheet, or surgical corrections, sanding gives you controllable metal removal with less setup, provided you finish methodically and seal fast.
How to Clean — Video Guide
A practical companion to this discussion is a beginner-friendly walkthrough that tackles a rusty trailer frame from first contact to final paint. The host demonstrates essential safety, surface prep, and coating steps with an emphasis on do-it-yourself results.
Video source: How to Clean and Paint a Rusty Trailer Frame
800 Grit Sandpaper Sheets (25-pack) — 9x11 in Silicon Carbide Abrasive for Wet or Dry Use — Smooth-polish abrasive for refining gloss layers on clear coat, resin, or composite surfaces before final buffing. (Professional Grade).
Frequently Asked Questions (FAQ)
Q: When should I choose blasting over sanding for heavy rust?
A: Choose blasting for thick, layered rust on sturdy parts like frames, axles, crossmembers, and brackets, or where geometry includes seams and cavities a disc can’t reach. It’s faster, cleans deeper, and creates a better anchor profile for epoxy primers. Use sanding on thin sheet metal or small, isolated areas where heat and metal removal must be tightly controlled.
Q: What media and pressure are safest for automotive sheet metal?
A: Use fine, angular media like 80 mesh garnet or 40/70 crushed glass at 50–70 psi with an 8–12 inch standoff and a 30–45 degree angle. Keep the nozzle moving, avoid dwelling in pits, and monitor temperature. For extra safety, spot-blast only the worst areas and finish with 80–120 grit DA sanding.
Q: Can I rely on a wire wheel for rust repair before painting?
A: Wire wheels remove loose scale and debris but often smear rust and leave embedded oxides. They’re good for pre-cleaning, but for paint-grade prep, follow with blasting or sanding to bright metal and a controlled surface profile. Finish with an epoxy primer shortly after prep.
Q: How do I prevent flash rust after blasting or sanding?
A: Work when steel temperature is at least 5°F above dew point, blow down and solvent-wipe the surface, and apply epoxy primer within an hour. In humid conditions, consider a non-residue rust inhibitor rinse designed for blasting cleanup; never leave bare steel overnight if you can avoid it.
Q: What grit finish is best before epoxy primer if I sand instead of blast?
A: After heavy rust removal with 36–40 grit, step down to 80 grit and cross-hatch to reduce directional scratches. Many epoxy primers bond well to 80–120 grit finishes; check your product’s technical data sheet and avoid polishing beyond what the primer can bite into.