
Between Coats Sanding on Vertical Surfaces Guide
You paused at the hallway door, a brush in one hand and a cup of finish in the other, startled by how quickly a glass-smooth wet coat can turn into little curtains of drips. The project had started out so confidently: a flawless sanded surface, careful masking, a plan. But the moment you switched to a vertical panel, gravity joined the job, and suddenly every dust nib, raised grain, and tiny bubble showed up like a magnified flaw. This is where between coats sanding becomes your quiet, steadying ally—especially on vertical surfaces. Done well, it erases yesterday’s mistakes and sets the stage for a controlled, silky next coat instead of a guessing game.
If you’ve ever chased imperfections by adding more finish only to worsen the sags, you’re not alone. Vertical work—doors, cabinet faces, built-ins, stair balusters—feels more exposed than a tabletop. You see everything in raking light; you feel every bump when you pass your hand along the edge. The fix isn’t more product; it’s process. Allow the film to set, then lightly level it. Between coats sanding should be gentle, predictable, and repeatable: a de-nib, not a full resurfacing; a reset, not a redo. With the right abrasives, pressure, and timing, you’ll keep edges crisp, prevent burn-through, and give the next coat the micro-tooth it needs to level without running. The reward is visible with every reflection: a calm, continuous sheen that looks like it defied gravity.
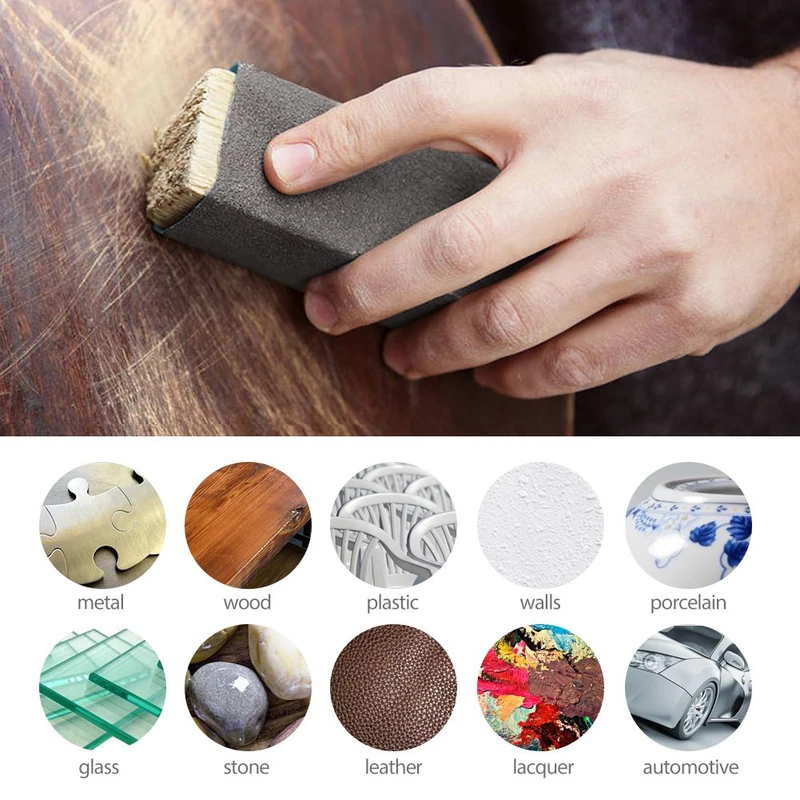
Quick Summary: On vertical surfaces, treat between coats sanding as a light, methodical de-nib; use the right abrasives, minimal pressure, and strict dust control to get a smooth, run-free final finish.
Why gravity changes the game
Horizontal finishing forgives—wet film self-levels before solvents flash or water evaporates. On verticals, gravity pulls finish downward while the film is still soft, making runs and sags far more likely. That single difference changes everything about how you pace coats and how you sand between them.
Drying behavior matters. Oil-based varnishes and polyurethanes cure by solvent evaporation and oxidation; they’re slower, which can invite sags if you lay them on too heavy. Waterborne polys flash faster, reducing big runs but making lap marks and dry-edge ridges more common. Lacquer re-dissolves into previous layers, so scratches can be hidden, but it also gums if you sand too soon. Shellac dries fast and sands easily but can burn through in a blink on edges.
On verticals, de-nibbing is your steering wheel. Instead of flattening the whole surface aggressively, you’re simply removing high spots—dust nibs, raised grain, fine orange peel—so the next coat sits flatter without needing excess thickness. Timing is critical: sand after the coat is hard enough not to gum yet soft enough to cut cleanly. The sweet spot is often when the finish no longer smells strongly of solvent and a folded piece of 320–400 grit slides without clogging. Use raking light to see flaws and shadow lines; the goal is uniform scratch without dulling through to stain, especially on corners.
Edges and profiles deserve double caution: the film is thinnest there, and most burn-throughs happen not from pressure but from contact time. Keep blocks soft and passes short. Think of sanding as “dusting the surface” rather than “grinding it flat”—a small mental shift that preserves film build and shaves off defects safely.
Tools for successful between coats sanding
For vertical work, the best tools help you keep contact light, controlled, and shape-friendly. Build a small, purpose-driven kit you can grab for every de-nib session:
- Abrasives: 320–400 grit for most de-nibbing on polyurethane and varnish; 400–600 for waterborne topcoats and shellac; maroon/gray nonwoven pads for delicate scuffing and profiles.
- Backers: a cork or rubber-faced sanding block (3/8–1/2 inch), foam interface pads, and flexible sanding sponges. These spread pressure and follow slight curves without biting edges.
- Profiles: thin foam pads or felt-wrapped craft sticks for trim, dowels wrapped with paper for inside curves, and a razor blade (see later) for isolated runs.
- Lighting and dust control: a handheld raking light, a brush-tip vacuum, microfiber cloths slightly dampened with water (for waterborne) or mineral spirits (for oil-based) to pick up fines.
Five tips to dial in between coats sanding on verticals:
- Float the block. Grip it with fingertips and let it skate, not dig. If you see white powder quickly, you’re cutting; if you see rolls or shine, it’s too soft—wait longer.
- Hold abrasives generously. Wrap paper around a block with a broad face; avoid narrow contact areas that concentrate pressure and cause cut-throughs.
- De-nib, then stop. Don’t chase perfection in one session. Your goal is to level the next coat, not polish the current one to final.
- Work in zones. Top to bottom, left to right, resetting the block often to keep mental and physical pressure even.
- Replace abrasives early. On finishes, fresh paper cuts cooler and cleaner; loaded paper heats and smears.
A small nonwoven pad on profiles can feel slower than paper, but it’s safer. Keep paper for flats and pads for shapes. And if you’re ever unsure, test on the back edge of a door or a scrap panel with the same finish buildup before you commit to the show face.
Prep that prevents problems
Superior sanding starts before you touch the surface. If your environment and prep are dialed, de-nibbing becomes a few calm passes instead of problem-solving.
Control dust. Vacuum the room, switch off blowy HVAC registers, and mist the air lightly with water to drop floating particles before you start. Wear a clean shop apron and keep a dedicated, lint-free microfiber just for finish work. Raking light helps you find dust nibs now so you don’t “discover” them when the next coat hits.
Mind the chemistry. For waterborne topcoats, wipe with a slightly damp (water-only) microfiber after vacuuming; tack cloths can leave residues that interfere with adhesion. For oil-based varnish or polyurethane, a light wipe with mineral spirits removes fines without raising grain. Never over-wet—just enough to lift dust. Strain your finish through a paint strainer or fine mesh each time to remove dried skin and debris that become tomorrow’s sanding targets.
Mask edges that must remain crisp (like inside door panels) with low-tack tape, pulling it after the next coat levels. Support parts securely: hang doors on sturdy hooks or use painters’ pyramids to tilt large panels at a gentle angle rather than perfectly vertical; that small lean reduces runs while you work.
If you encounter persistent roughness even after careful sanding, it may be grit choice, pressure, or a too-thick prior coat. A gentle increase in grit or a harder block can help cut nibs cleanly—just be mindful of edges. Italic note for perspective: According to a article.
Finally, keep sessions short. De-nib in 10–15 minute passes, clean thoroughly, and recoat while the surface is dust-free and within the manufacturer’s recoat window. This “prep first” mindset is quiet insurance that pays off visibly in the next reflection.
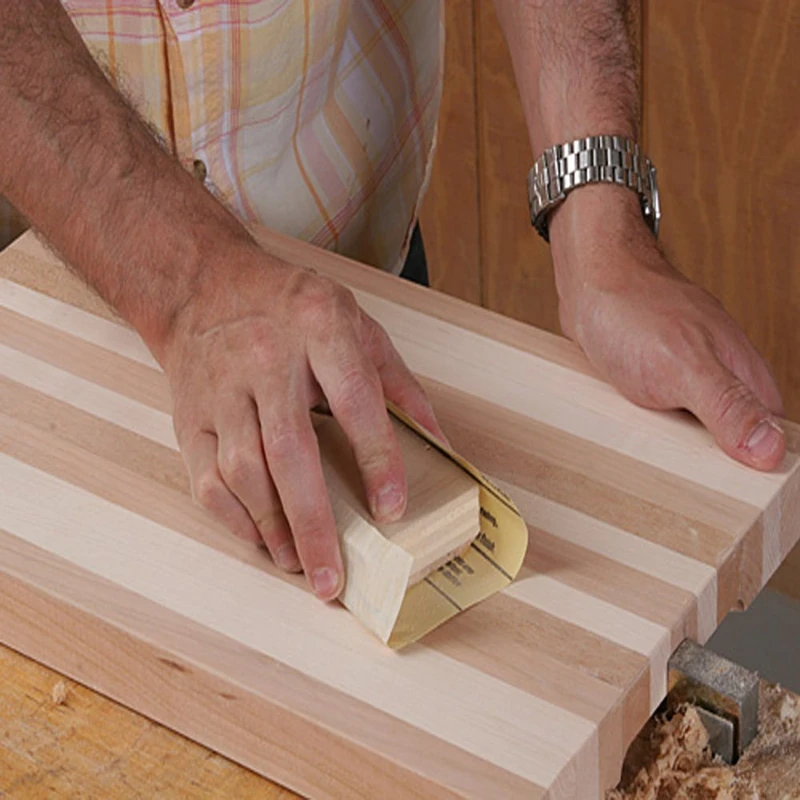
Step-by-step vertical de-nibbing
Follow a consistent routine so every coat sets you up for success rather than surprises:
- Confirm cure. Touch an inconspicuous spot with a fingernail. If it dents or feels rubbery, wait. If it powders under 320–400 grit in a test swipe, you’re ready.
- Light the surface. Use a raking light held low across the work to reveal dust nibs, sags, and dry-edge ridges.
- Choose the right abrasive. Start with 400 on waterborne or shellac; 320–400 on oil-based. Use a soft block on flats, a nonwoven pad on profiles.
- Float the block. Work top to bottom in small, overlapping ovals. Apply only fingertip pressure—just enough to keep contact. You’re cutting high spots, not flattening the field.
- Spot-sand defects. For a raised nib or tiny sag, isolate it: a small square of paper on a pencil eraser or felt stick, a few light passes until the defect is level with the field. Avoid sanding a broad “halo” around the defect.
- Mind edges. Skip direct edge-on sanding at first. After the field is de-nibbed, lightly kiss edges once with a worn 400 grit wrapped around a soft pad. One or two feather-light passes are enough to break dust nibs without cutting through.
- Clean and inspect. Vacuum with a brush attachment, then wipe with a microfiber appropriate to your finish chemistry. Re-check with raking light. If you see uniform dullness without shiny dots, the surface is prepped.
If you accidentally reveal a shiny low next to a dull field, you’ve leveled a high spot successfully; keep the surrounding area minimal. If you hit color on an edge (burn-through), stop and plan a careful touch-up before recoating. Rushing here creates witness lines you’ll chase for days.
Finally, recoat thin. On verticals, your next coat should be lighter than on a horizontal panel, favoring multiple thin passes over one heavy application. Thin coats reduce the amount you’ll need to sand next time and slash the risk of sags.
Fixing runs, sags, and edges
Even with discipline, verticals sometimes sag. The safest fix is surgical: remove only the excess and protect surrounding film.
For fresh runs (still soft but no longer flowing), resist the instinct to brush them out; you’ll create a larger ripple. Let them harden completely. Then use a sharp razor blade as a tiny scraper: flex it slightly with tape on the corners for safety, hold it almost vertical to the surface, and shave the run from top to bottom with short strokes. You’ll see the shiny ridge flatten into a matte plane. Follow with 400 grit on a hard block to blend only as much as needed, then de-nib the field lightly.
Edge protection is non-negotiable. Corners and profiled edges collect less finish and sand off faster. Wrap paper around a soft block and de-pressure your grip before touching an edge. When in doubt, use a worn sheet of 400–600 grit to “tickle” edges once and move on. On balusters or trim, rotate the work to keep the abrasive traveling across, not along, the edge, which reduces the chance of cutting through.
Adhesion windows matter: if you’ve waited past the recoat time, increase your scuff slightly (e.g., from 400 to 320) to create micro-tooth before the next coat. For lacquers and shellac, lighter grits still work because solvents can melt in; for fully cured polys, a bit more scratch may be necessary.
Fast, field-proven tips for problem spots:
- Tape off the defect perimeter when scraping a run to protect adjacent film.
- Use raking light during scraping; stop the instant the ridge disappears.
- On orange peel, de-nib with a hard block and 400 grit, then let the next thin coat do the final leveling.
- If you must spot-prime a burn-through on stained work, tint a drop of finish with a compatible dye first, test on scrap, then feather it in microscopically.
Fixing isn’t about erasing history; it’s guiding the surface back to level with the smallest footprint possible. Every gentle correction preserves film build and buys you a smoother final coat.
Timing, grits, and finish specifics
Different finishes respond differently to between coats sanding, and vertical orientation magnifies those differences. Treat these guidelines as a calibrated starting point:
- Waterborne polyurethanes: Flash fast, sandable in 60–120 minutes in moderate conditions, but safer at 2–4 hours. Use 400–600 grit or gray nonwoven pads. They’re prone to raised grain on raw wood; after the first seal coat, de-nib lightly and keep coats thin to avoid lap ridges on verticals.
- Oil-based varnish and polyurethane: Longer open time invites sags if you apply too much. Wait 8–24 hours before de-nibbing with 320–400; if paper loads, it’s not ready. Keep the room warm and ventilated. Thin the next coat slightly (per manufacturer guidance) for verticals to improve flow without bulk.
- Lacquer: Sands early but gums if rushed. Wait until the solvent smell subsides and test-sand a corner. 400 grit or maroon pads work well. Because coats melt into each other, you can safely reduce scratch visibility with a quick follow-up light pass.
- Shellac: Sands like a dream and dries fast. Use 400–600, go even lighter on edges. It’s easy to overdo—count strokes and stop early.
Recoat windows are real. Within the “hot” window, adhesion is mostly chemical; past that, mechanical adhesion (your scratch pattern) does more of the work. If you miss the window by a day or more on fully cured polyurethane, step down one grit to 320 for a uniform scuff and be thorough in dust removal.
Environmental control helps, too. Aim for 60–75°F and 40–60% RH. On verticals, a slightly cooler room slows flow just enough to reduce sags if you’re disciplined with thin coats. Conversely, if it’s too warm and dry, coats can flash before they settle, leaving texture you’ll chase at the next sanding. Always test a small, low-visibility area first to confirm your timing and grit choice.
Improper sanding between — Video Guide
If you’re a visual learner, there’s a helpful video titled “Improper sanding between coats of finish—how to avoid it,” which breaks down exactly how to de-nib without causing new problems. In a few clear steps, it shows how light pressure, the right grit, and a clean surface lead to that silky, touchable finish we all want.
Video source: Improper sanding between coats of finish- HOW TO AVOID IT!
320 Grit Sandpaper Sheets (25-pack) — 9x11 in Silicon Carbide Abrasive for Wet or Dry Use — Precision finishing grit that enhances clarity between paint or lacquer coats, ensuring a flawless final layer. (Professional Grade).
Frequently Asked Questions (FAQ)
Q: Do I have to sand between every coat on vertical surfaces?
A: For most clear finishes, a light de-nib between coats improves adhesion and smoothness. You’re not leveling fully—just removing dust nibs and giving the next coat micro-tooth.
Q: What grit should I use for between coats sanding on a door?
A: Start with 400 for waterborne finishes or shellac, and 320–400 for oil-based varnish/poly. If you’ve missed the recoat window or feel slick gloss, step to 320 for a more reliable scuff.
Q: How can I prevent sags after I’ve sanded?
A: Apply thinner coats, tip off with the grain, and slightly tilt large panels to reduce vertical pull. Keep the room moderate in temperature and recoat within the recommended window.
Q: My paper clogs immediately—what am I doing wrong?
A: The finish likely isn’t ready. Wait longer and test again. Also ensure you’re using open-coat paper or a suitable nonwoven pad, and keep pressure minimal so you’re cutting, not smearing.
Q: How do I sand curved trim and profiles without burning through?
A: Use gray/maroon nonwoven pads or felt-wrapped sticks with 400–600 grit. Keep passes light and brief, rotating the work so abrasives travel across edges, not along them.