
Sandpaper Grit Chart: Primer and Clear Progression
It starts with a glare off the shop lights. You see it the second the panel rolls out from the booth: a faint wave in the primer by the door edge, a couple specks dried into the clear where a moth made poor life choices. I’ve been there more times than I can count—hands on the hood, thinking through where the surface is and where I need it to go. That’s where the sandpaper grit chart on my cabinet door earns its keep. It’s not just a list of numbers; it’s a roadmap that keeps you from driving your finish off a cliff. Skip the wrong exit and you’re stuck with telegraphed scratches, sink-back, or worse—basecoat haloing when you thought you were ready to spray.
On a cold morning, I line up my blocks, DA with a soft interface pad, guide coat, and a bucket for wet sanding. Primer panels first. I dry-sand in long, relaxed strokes, then wipe with a clean towel and read the surface under raking light. It’s tactile work—you feel it when the paper cuts too aggressively, and you hear it when the panel is truly flat. Clear coats ask for a different rhythm. You bring them down in gentle steps and let the polishers do the singing. The right progression lowers the mountain without blasting craters into the landscape.
If you’re getting back into the game after a break—or you’re pushing for that next-level finish—this guide is your bench mate. I’ll walk you through real-world grit progressions for primer and clear, show you how to choose between wet and dry, explain why your DA orbit matters, and share the shop habits that pay off in flawless reflections. No fluff—just steps, grit by grit, with the why behind each move so you can adapt to your paints, your tools, and your deadline.
Quick Summary: Use a measured grit progression—guided by a practical sandpaper grit chart—to level primer, prep for base, and refine clear coat to a show-quality finish without telegraphed scratches.
Primer prep: from fill to feather
Primer is your forgiveness layer and your truth serum. It bridges minor filler work, seals, and gives you enough film build to flatten a panel without cutting into the metal or edges. The trick is using grits that remove defects quickly while leaving a scratch pattern your next step can erase cleanly.
After filler shaping (typically 40–80 grit longboard, then refining to 120), move to epoxy or a 2K high-build primer per your paint system’s TDS. Once cured, hit the panel with a dry guide coat. This powder tells you exactly where the hills and valleys live. Start your primer leveling with P180–P220 on a rigid or semi-rigid block for flat areas—door skins, hood centers, quarter panels. Keep your strokes long, change directions every few passes, and lift pressure at edges to avoid burn-through. Around tight curves or edges, switch to a foam-backed sheet or a block with a soft interface so your paper follows the shape instead of digging into it.
When the guide coat shows even scratch across the panel with no low spots, step to P240–P320. If you used P220, jump to P320; if you started at P180, go P240 then P320. On a DA with a 3/16" (5 mm) orbit and a soft interface, P320 dries quickly and keeps panels honest. Blend zones and jambs respond well to a red scuff pad and P400 foam sheets to keep things uniform.
A few shop-learned primers dos and don’ts:
- Always re-apply guide coat after each grit change. It keeps you honest and reduces “ghost” scratches.
- Feather edges with one grit finer than your main cut to avoid ringing under base.
- If pinholes appear, stop and address them—don’t chase them flat; you’ll trench the area and create a wave.
- Vacuum often and clean towels only; dust becomes rogue abrasive that creates mystery scratches.
How a sandpaper grit chart guides sequences
A good sandpaper grit chart isn’t just a reference—it’s a translator between what the surface needs and how aggressively you should cut. Two details matter most: the numbering system and the material under your paper. Most automotive papers use FEPA “P” grades (P180, P320, P800, etc.). They are not one-to-one with old CAMI numbers you might recall from woodworking. P320 FEPA, for instance, leaves a finer scratch than CAMI 320. When you’re prepping primer for basecoat or refining clear, that difference keeps surprises out of your finish.
In practice, think of grits in three families:
- Coarse shaping (P80–P180): For filler shaping and initial primer leveling.
- Mid-cut for refinement (P220–P400): For flattening primer and prepping for base.
- Fine finishing (P600–P3000+): For wet sanding primer before base (depending on system) and for clear leveling and pre-polish steps.
Each pass should do two things: erase the previous scratch pattern and prepare a surface the next step can erase with minimal effort. Skipping more than two steps in the “P” scale is where telegraphing starts. Crosshatch your strokes at 45° and then 90° so you can read scratch direction under raking light. If you still see lines running against the new pattern, you haven’t fully replaced the previous grit’s scratches.
Remember technique matters as much as number. A DA with a soft interface cuts differently than a hard block, and dry paper at P400 bites more aggressively than wet. For primer, many painters stop at P320 dry or P400 wet for solid colors; for metallics, finer is safer—P400 dry or P600 wet avoids basecoat “hanging” in visible scratches. On clear, start finer than you think, especially if you’re new to leveling peel. It’s easier to take a second pass with P1500 than to compound out P1000 gouges you didn’t need to make.
Dialing in primer sanding sequences
Here’s a reliable, workshop-tested progression to take primer from lumpy to base-ready. Adjust for your paint system’s recommendations, film build, and color choice.
- Step 1: Map and block. Apply guide coat. Dry-sand with P180–P220 on a flat block to knock down highs. Stay off edges or use a softer block there.
- Step 2: Re-guide and refine. Move to P240–P320 on a DA with a soft interface pad or continue by hand on complex curves. Keep the pad flat; don’t dig with the edge.
- Step 3: Detail zones. Use P320–P400 foam-backed sheets in handles, mirrors, and fascias. Scuff adjacent OEM clear with a red pad and a dollop of universal soap to keep it consistent.
- Step 4: Final base prep. For solid colors, P320 dry or P400 wet often flies. For metallic/pearl, target P400–P600 wet to avoid flop issues. Always follow your basecoat TDS.
According to a article. the safe, common bands line up with what you’ll see across brands: P220–P320 to level primer, P400–P600 to prep for color, and P1000+ once you’re on clear. The key is not just the number but the condition the number leaves behind.
Practical tips from the booth and bench:
- Keep it cool and clean: Heat swells primer and hides lows. If the panel feels warm, pause. Dust off with vacuum and microfiber—no shop rags.
- Guide coat every time: If you can’t prove a scratch is gone, it isn’t. Cheap powder saves expensive do-overs.
- Respect edges: One light pass at P320 is worth three heavy ones at P220 near a body line. Tape edges if you’re new to protect them.
- Test panel first: If you’re unsure about your system, prep a small, primed panel through P320, spray base/clear, and cut it open to study what telegraphs.
Clear coat leveling and polishing
Clear responds to patience. Your goal is to remove defects with the minimum necessary cut, then step down scratches until the buffer can finish the job quickly and cool. If your clear is fresh, always confirm it’s fully cured per the TDS; soft clear loads paper and invites pigtails.
For dust nibs and mild peel, start local: knock down nibs with a denibbing tool or a sliver of P1000–P1500 on a tiny hard block, keeping the area tight. For overall leveling, here’s a conservative wet-sand sequence:
- P1200 or P1500: Establish a uniform, matte surface. Use a hard or semi-rigid block on flats; a foam interface on curves. Lubricate with clean water plus a drop of shampoo; wipe often to check progress.
- P2000: Erase P1500 quickly. Keep your strokes straight and crosshatched. Avoid sitting on edges—tape them if needed.
- P3000 foam disc: DA with a soft interface to reduce hand sanding marks and set up for fast cutting.
- Optional P5000 foam disc: Reduces compound time and heat, especially on dark colors.
Compounding should feel easy if the grit work is right. Start with a cutting compound and a microfiber or wool pad at low-to-mid speed; keep the pad flat, clean it often, and watch panel temp. Follow with a finishing polish on a soft foam pad to remove haze. Under LED inspection, you should see clarity without stray loops or holograms.
Clear-coat pointers that save hours:
- Chase uniformity, not perfection at the first grit. If you see glossy low spots after P1500, you’re not done leveling—going to P2000 too soon just buries the problem.
- Run a tape “witness line” along a body crease; if you cut through the tape early, you’re riding the edge too hard.
- Force-dry smartly: Baking speeds cure, but over-baking can make clear brittle and harder to refine. Stick to system specs.
- Keep your water clean. Two buckets or a constant trickle beats dipping into slurry that creates new scratches.
Avoiding scratches, burns, and sink-back
Most rework comes from three culprits: deep scratches that telegraph, edge burn-throughs, and dieback/sink-back that shows a week later. The best cure is prevention baked right into your process.
Telegraphed scratches come from skipping too far in grit, contaminated paper, or loading. If you cut primer with P180 and jump to P400, you’ll be chasing stubborn lines. Keep steps tight (P180 > P240 > P320 > P400 wet), and swap paper the moment it stops cutting cleanly. Contamination—like a rogue P80 fleck on your P600 pad—creates tracks you don’t notice until clear. Store sheets in zip bags or original boxes and never toss different grits into the same drawer.
Edge burn-throughs happen because edges concentrate pressure and film build is thinner there. Block flats, pad curves, and tape sharp lines when you’re new or when the panel is thin. Let the tool’s weight do the work; white-knuckling just digs. When compounding, keep your pad flat and off the edge. Tilted pads cut aggressively and cook clear.
Sink-back (or dieback) reveals itself after solvents escape and coatings settle into scratches or low spots. It starts earlier than you think—over-sanding a panel warm, rushing flash times, or burying rough primer under base to save time. Slow down at the primer stage: let coats cure fully, sand cool, and wipe with slow-evap cleaners. If you can smell solvent strong from the panel, it’s not ready.
Actionable safeguards:
- Touch-test temperature: If the panel feels warmer than your hand, wait. Heat hides lows and makes paper smear.
- Clean-hand rule: Wipe panels with fresh microfibers only. A single metal shaving on a towel carves mystery arcs.
- Control your interface: Match pad softness to the panel. Hard flats? Rigid block. Subtle curves? Soft interface. Tight convex? Foam-backed sheets by hand.
- Light it right: Use raking light at 45° and shift your body. If you can’t see the scratch direction, you can’t remove it efficiently.
General Sandpaper Selection — Video Guide
If you’re a visual learner, a concise walkthrough beats any chart. A solid video overview of sandpaper selection for automotive body repair breaks down which grit families to use for stripping, filler shaping, primer prep, and clear coat refinement. It emphasizes how each operation sets up the next, so you don’t waste time compounding what sandpaper should have handled.
Video source: General Sandpaper Selection & Grit Guide for Auto Body Work
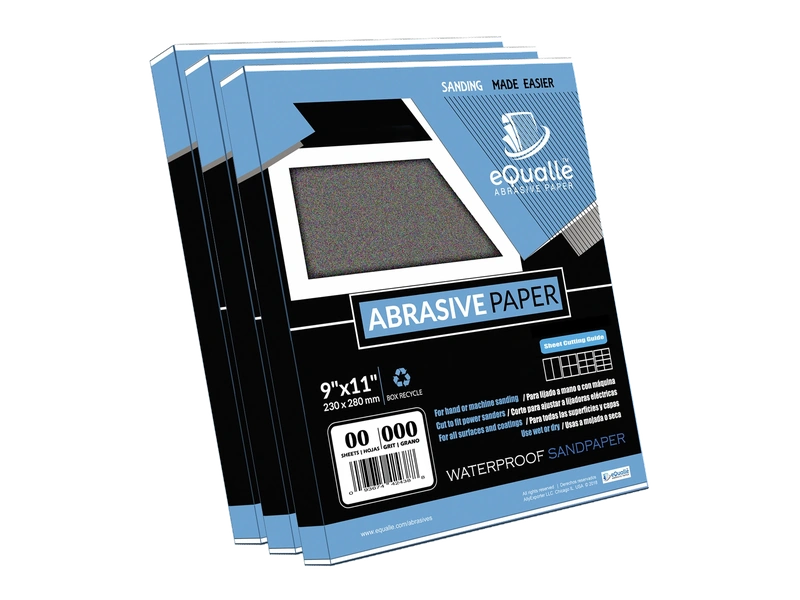
180 Grit Sandpaper Sheets (100-pack) — 9x11 in Silicon Carbide Abrasive for Wet or Dry Use — Medium finishing grit that refines wood, metal, or drywall before painting. Provides even texture and cutting control. Excellent for wet or dry sanding where a uniform surface is needed. (Professional Grade).
Frequently Asked Questions (FAQ)
Q: What grit should I finish primer with before basecoat?
A: For solid colors, P320 dry or P400 wet is common; for metallics and pearls, go finer—P400 dry or P600 wet. Always verify with your basecoat’s TDS.
Q: Can I jump from P180 straight to P400 on primer?
A: It’s risky. You’ll likely leave P180 scratches that telegraph. Safer is P180 > P240 > P320, then P400 wet if your system calls for it.
Q: What’s a safe starting grit for leveling clear coat orange peel?
A: Start conservatively at P1500, check, then move to P2000 and P3000 foam. Only drop to P1200 if peel is heavy and you have the film build to support it.
Q: DA or block for primer sanding?
A: Use both. Blocks keep flats honest and prevent low spots; a DA with a soft interface speeds uniform refinement on larger areas. Cross-check with a guide coat.
Q: Why do scratches reappear a week after polishing?
A: That’s sink-back. Solvents settle coatings into subsurface scratches. Prevent it by respecting cure times, sanding cool, and keeping your grit steps tight and clean.