
Sandpaper grit 3000 for faster polishing
Saturday afternoon light angles across your workbench. There’s a piece you’ve been living with for weeks now—a motorcycle cover, a resin casting, maybe a metal panel from a restoration project—almost finished, not quite gleaming. You’ve already invested hours stepping through the paper stack, rinsing, wiping, inspecting. Still, the last 10% of the job feels like the last 90% of the effort. That’s where smart use of sandpaper grit, especially finishing at 3000, starts to feel less like a detail and more like a turning point. The moment a faint reflection becomes clear, the surface stops fighting you and starts cooperating.
In my experience working with makers, garages, and small shops, confidence at the finishing stage is earned by repetition and by a clear plan. What slows most people down isn’t the polish itself; it’s the mismatch between scratch pattern and compound, or lingering defects hidden by slurry. Too coarse and the compound works forever. Too fine and you glaze the surface without removing the last defects. Finishing at 3000-grit—especially with modern foam-backed discs—often hits a practical sweet spot: fine enough that polishing becomes quick and predictable, but not so fine that you burn time chasing microscopic lines that a compound can erase in seconds.
So think about what you want to see when you lean in: a true reflection with crisp edges, no gray clouding in the highlights, no “orange peel” texture. That outcome is as much about workflow and rhythm as it is about tools. Whether you’re chasing gloss on aluminum, clear coat, epoxy, acrylic, or even a turned wood piece you plan to seal, adopting a systematic path to 3000 and then a short, efficient polish can shorten the road from almost-done to done-done. Let’s build that path together—calmly, methodically, and with respect for the surface in front of you.
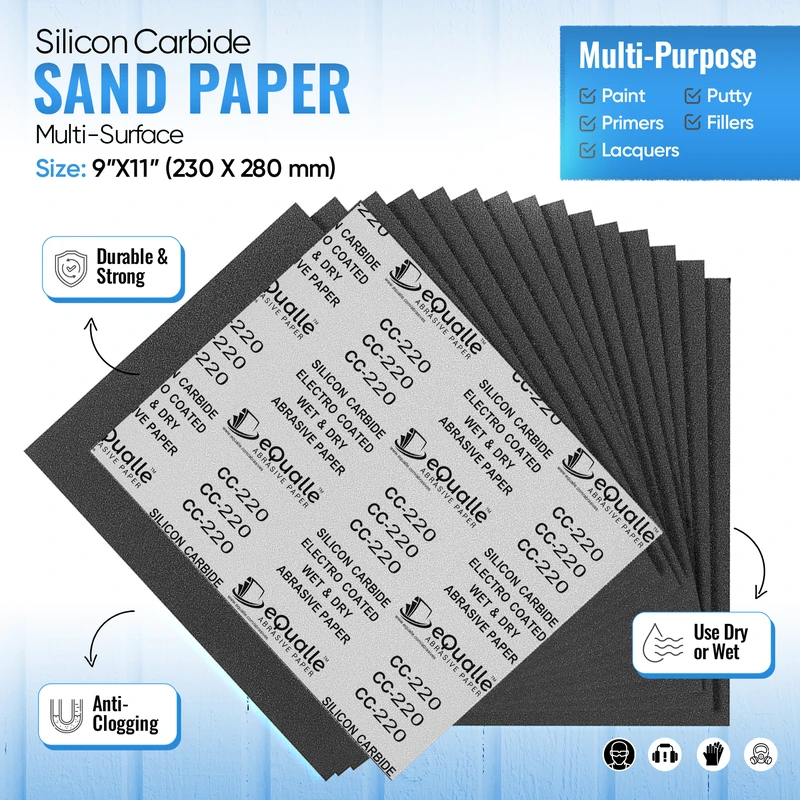
Quick Summary: Finishing at 3000-grit sets up a fast polish by minimizing deep scratches without over-refining; pair it with clean steps, proper pads, and controlled speed.
The moment a surface starts to shine
There’s a distinct pivot point in every finishing job when the surface begins to respond. Before that, it feels dull and stubborn; after, each pass gets more satisfying. 3000-grit finishing is designed to place you on the favorable side of that pivot, where compound efficiency is high and heat stays low. If you’ve ever spent too long compounding a 1500- or 2000-grit scratch pattern, you know the drag. The compound warms, pads load, edges smear, and you’re left wondering whether to switch products or keep pushing. Finishing at 3000—especially using a foam interface—replaces those trenches with uniform micro-scratches that a modest cut compound can level quickly.
Why does this work? Scratch depth falls off nonlinearly as grit rises; the step from 2000 to 3000 often halves the depth of remaining grooves. That change reduces the time and aggressiveness required from your polish, which also lowers risk on sensitive surfaces like clear plastics or thin clear coats. It’s not buzzword science; it’s geometry and heat management. You’re asking your abrasive stages to do the heavy lifting, and your polish to do the refining.
This approach also respects material differences. Metals like aluminum and stainless show every inconsistency; plastics can haze if you overheat them; epoxies love consistency but punish rushed steps. On all of these, stepping to 3000 with light pressure and plenty of lubrication helps lock in uniformity before you ever spin up a polisher. Then, a brief polish uncovers depth rather than chewing through defects. The satisfaction is real: fewer passes, less cleanup, and a clear reflection that doesn’t fade once the surface cools. If you’ve been hovering at 2000, consider that extra step—done well, it pays you back in minutes, not hours.
Choosing sandpaper grit for quick polishing
Selecting the right sandpaper grit sequence is like composing gears on a bike: each shift should feel purposeful. Your aim is a scratch pattern the next step can fully remove—without wasted motion. For speed polishing, think in three phases: shape/level, refine, and pre-polish.
- Shape/level: 220–400 (sometimes 600) to flatten and remove casting marks, orange peel, or tool lines. Stop as soon as defects are gone.
- Refine: 800–1500 to erase the previous grit’s peaks and start reducing texture. Cross-hatch patterns help confirm uniformity.
- Pre-polish: 2000–3000 to minimize scratch depth and create an even, shallow texture your compound can clear rapidly.
When someone says “finish at 3000,” they usually mean a foam-backed 3000-grit disc or pad, sometimes labeled as P3000 (FEPA grade). Foam backing matters: it distributes pressure and reduces pigtails on a dual-action (DA) sander. Micro-mesh or film-backed options in 2400–3600 (approximate P2400–P3000 equivalents) can also work, especially on plastics and resins.
A few selection notes:
- Coated vs. film vs. foam-backed: Film-backed papers cut flatter on hard coatings; foam-backed papers conform better on curves and reduce DA swirls.
- Wet vs. dry: Wet sanding at 2000–3000 helps keep scratch edges crisp and prevents loading, especially on resins and paints.
- Compound pairing: If you plan to use a medium-cut compound, 3000 is ideal. If you must jump straight to a fine finishing polish, consider 4000–5000—but expect more sanding time.
Don’t forget scale conversions. “P” grades (FEPA) are common in finishing discs. CAMI labels without “P” can differ slightly. If in doubt, match brand systems within a project to maintain predictable step-downs. Most importantly, treat your last abrasive step as the setup for success: consistent coverage, light pressure, and fresh, uncontaminated media. That’s how sandpaper grit choices turn into visible time savings.
A 3000-grit finishing workflow that saves time
Let’s put the sequence into a practical flow you can repeat. The details below assume a dual-action sander plus a rotary or DA polisher. Adjust for your tools, but keep the rhythm.
- Defect removal and leveling
- Start at the coarsest grit that doesn’t overshoot the defect: 320 or 400 for paint and resin, 220–320 for metals with tool marks.
- Sand with light-to-moderate pressure; keep the tool flat to avoid gouges.
- Wipe, inspect under angled light, and only move on when the defect is truly gone.
- Mid-grit refinement
- Move to 800, then 1200 or 1500. Change directions between steps (e.g., cross-hatch) to confirm you’ve erased the previous pattern.
- Use a clean spritz of water with a drop of dish soap on plastics and epoxies; go dry on bare metals unless loading forces you wet.
- Rinse and wipe between grits; never drag old slurry into the next step.
- Pre-polish at 2000–3000
- Switch to a foam-backed P2000 or P3000 with a soft interface pad on the DA. Minimal pressure, slower arm speed.
- Keep the disc fresh; if it stops cutting, replace it—spent 3000 just burnishes.
- Your goal is an even, low-gloss sheen with no visible tracks or pigtails.
- Short, controlled polish
- For aluminum and hard coatings: medium-cut compound on a foam cutting pad at 1200–1600 rpm (rotary) or speed 3–4 (DA).
- For plastics and epoxies: reduce speed to avoid heat; consider a finishing foam with a “one-step” polish if the 3000 pass was thorough.
- Polish in small sections, wipe clean, and inspect with a bright LED at low angle.
According to a article, a true mirror finish demands a “mirror-grade” scratch pattern; speed finishes can look excellent but won’t mimic a perfect spray gloss if the substrate still carries texture. That’s an honest check: if orange peel or deep marks persist after 1500, invest there rather than betting on compound.
Actionable tips for faster, safer polishing:
- Mark-and-check: Use a wax pencil grid before each grit; when the grid is gone uniformly, you’ve achieved full coverage.
- Prime the pad: Lightly dampen foam polishing pads with a spritz of detailer or water; a dry pad can scour and haze.
- Control the interface: Add a 1/4" foam interface pad under 3000 discs on curved parts to prevent pigtails and edge cut-throughs.
- Clean as you go: Blow off the surface and pad between sections; stray 800-grit particles can ruin a 3000 pass.
Keep the mindset simple: each step exists to erase the last one, nothing more. When you achieve that discipline, 3000 becomes a springboard, not a finish line you labor over.
Troubleshooting haze, peel, and micro-scratches
Even with a solid 3000-grit strategy, a few problems can steal gloss. Here’s how to recognize and fix them without backtracking too far.
Persistent gray haze after polishing: This often means the 2000 step wasn’t complete before jumping to 3000, leaving deeper troughs the compound can’t fully clear. Solution: Drop back one grit (to 2000), ensure complete, uniform coverage, then repeat 3000 lightly. Use a brighter inspection light at a shallow angle; rotate the piece to catch directional scratches.
Pigtails and swirls from a DA: These small, comma-shaped marks usually come from debris under the disc or too much pressure on a hard backing. Clean the surface, add a foam interface under your 3000 disc, and lighten pressure. Slow your arm speed and let the abrasive do the cutting. Replace any disc that feels “grabby” or shows clogs.
Orange peel texture showing through: Polishing doesn’t flatten; it refines. If peel is visible after 1500, you likely need to revisit 1200 or even 800 on the high spots. Use a hard block or film-backed paper to level, then resume your refinement path to 3000.
Temperature bloom on plastics and resin: Milky patches that appear under a polishing pad usually come from heat. Reduce rpm, switch to a softer foam, and shorten your polishing cycles. On resin, a brief cool-down with clean water between passes helps avoid re-softening the surface.
Micro-dusting or pad clumping: Compounds and polishes load pads quickly after a 3000 pass because so little material is being removed. Flick pads clean with compressed air or use a pad brush every panel. Change pads more often than you think necessary; fresh foam finishes clearer and cooler.
Surface-specific checks:
- Aluminum and stainless: Wipe with alcohol between steps to remove dark oxide that can scratch. Avoid cross-contamination from steel particles.
- Painted clear coat: Measure film thickness if you can. If you’re near limits, rely more on 3000 plus a mild polish rather than aggressive compounding.
- Epoxy and acrylic: Stay wet through 2000–3000; keep pressure light; avoid lingering on edges where heat spikes quickly.
Hitting polish speed is about diagnosis as much as technique. If gloss stalls, analyze the scratch pattern and heat first, not the product label. Adjust one variable at a time—grit, pad, pressure, or speed—and you’ll find your way back to clarity.
Choosing sandpaper grit for quick polishing
If your goal is to compress work time without sacrificing gloss, consider how sandpaper grit interacts with the polishing stage you prefer:
- One-step polishes: These products finish down well but have limited cut. To use them efficiently, reach 3000 or finer. You’ll spend less time and generate less heat, especially on trim and edges.
- Medium-cut compounds: Designed to remove 2000–3000 scratches while finishing clean on most paints and metals. If you like their speed, stopping at 3000 sets them up perfectly.
- Heavy-cut compounds: Only necessary when you end at 1500–2000 or if you’re correcting harder defects. They can haze soft materials; if you must use them, plan a second polishing step.
Work backward from your polish and pad:
- Foam cutting pad + medium compound: Finish at 3000 for a quick, near-final gloss.
- Microfiber pad + medium compound: Can clear a 2000 pattern quickly, but manage heat and follow with a finishing foam if needed.
- Finishing foam + fine polish: Best if you’ve gone to 3000–5000 or if the surface is delicate.
For many projects, 3000 is the pivot that lets you step down pad aggression and step up speed. Done right, you can finish a panel with one compound and one foam pad, keeping dust low and cleanup simple. The bonus is consistency: your finish looks the same on Monday morning and Saturday evening, not just when the shop lights hit it perfectly.
How To Sand — Video Guide
A concise, hands-on demo shows an aluminum sheet taken from early sanding stages through a mirror finish, stepping from 220 up to 5000 and then polishing. You’ll see how each grit removes the last, why foam-backed finishing papers matter at the top end, and how a controlled polishing pass turns a uniform 3000–5000 scratch pattern into crisp reflections.
Video source: How To Sand and Polish Aluminum To Mirror Finish [Version 2.0]
800 Grit Sandpaper Sheets (100-pack) — 9x11 in Silicon Carbide Abrasive for Wet or Dry Use — Smooth-polish abrasive for refining gloss layers on clear coat, resin, or composite surfaces before final buffing. (Professional Grade).
Frequently Asked Questions (FAQ)
Q: Do I always need to go beyond 3000 for a perfect mirror?
A: Not necessarily. On many metals and clear coats, a uniform 3000 pattern plus a medium-cut compound yields a near-mirror. If you need an ultra-wet look or your compound is very mild, 4000–5000 can shorten polish time further—but expect more sanding time up front.
Q: Wet or dry at 3000?
A: Wet sanding at 3000 helps on paints, plastics, and resins by keeping temperature and loading down. On bare aluminum or stainless, you can go dry with light pressure, but wipe often to remove oxide; if loading appears, switch to a light wet mist.
Q: What pad should I use after finishing at 3000?
A: Start with a foam cutting or medium foam pad and a medium-cut compound. If the surface is soft or shows quick haze, switch to a finishing foam with a one-step polish. Keep speeds moderate (DA speed 3–4, rotary 1200–1600 rpm) and clean pads frequently.
Q: How do I know I’ve fully removed the previous grit’s scratches?
A: Use cross-hatching and a wax-pencil grid. Under bright, low-angle light, you should only see the latest scratch direction; any lingering lines running the old direction mean you need more coverage. Rinse and wipe before checking—slurry can hide defects.
Q: Is stopping at 2000 ever better than 3000?
A: If you plan to use a microfiber pad with a heavier compound, or you’re working on very hard coatings, a well-executed 2000 can be efficient. However, it often increases compounding time and heat. For speed and safety on a broad range of materials, 3000 is the more forgiving launch point.