
Hand sanding for crisp corners with rigid backers
It’s late—quiet enough that you can hear the scratch of abrasive cutting fibers and the subtle change in tone when the grit bites or skates. You’re chasing a perfect reveal line along a maple drawer front and one careless pass will bruise the edge you milled so carefully. Or maybe you’re at the bench with a rigid resin print—clean geometry, steep bosses, a seam that must disappear without softening the design language. This is where hand sanding pays rent. The control is absolute, but only if the setup is correct: rigid backer, flat abrasive, predictable pressure path, and a workflow that refuses to drape anything over a corner. The difference between a crisp facet and a rolled lip lives in thousandths of an inch—and every one of those thousandths cares about how your abrasive is supported.
Crisp corners fail when abrasives and fingers flex. Foam blocks feel forgiving, but their compliance funnels pressure into edges and radii where you want none. A wetted sheet clings around corners like shrink-wrap. Even a cloth-backed belt on a stick can dig at the boundary between two planes. The remedy isn’t mysticism. It’s mechanics: make the abrasive as planar as the surface you’re refining, stabilize your stroke vector, read the witness patterns, and never let the cutting face wrap the edge you’re preserving. Do this, and “hand sanded” stops meaning “softened” and starts meaning “controlled.”
You don’t need a metrology lab, but you do need a system. A dead-flat backer (glass, granite, machined aluminum), a film-backed abrasive that stays true under load, a grit progression that removes defects without piling on new ones, and a rhythm that keeps pressure uniform. With those in place, finishing a bevel that reads as a single optic plane is straightforward. Without them, you’re fighting the tool.
Quick Summary: Maintain sharp edges by pairing rigid, flat backers with film-backed abrasives, disciplined stroke paths, and progressive grits that never wrap over a corner.
Why corners fail during sanding
Edges are stress concentrators in both structures and sanding processes. When you press a compliant abrasive across a boundary, the backing bends, local contact pressure spikes, and the cut rate at the edge goes up relative to the flats. That’s why a soft sanding sponge erases a facet line fast—it’s acting like a pressure lens. Even finger pressure alone behaves as a small-diameter “roller” if you pinch the sheet, biasing removal at the edge.
Three mechanisms usually compound the problem:
- Backing compliance: Paper, cloth, foam, and unsupported sheets deflect. Deflection lets grit track over the corner at a steeper local attack angle and higher pressure.
- Abrasive fracture and loading: Near edges, grit fractures faster; worn grit smears and burnishes instead of cutting, then grabs and rounds when fresh grains break through.
- Material response: End grain in woods, thin primer films, and some thermoset resins cut disproportionately at edges because fibers or polymers are less laterally supported. Soft metals gall and then tear out along boundaries.
Oscillation also matters. Random-orbit motion has a built-in tendency to traverse edges at many angles, which is fine when breaking edges intentionally but risky when you need geometric fidelity. Hand sanding with a disciplined stroke can outperform machines in these scenarios precisely because you can enforce a vector that never crosses the ridge.
Another failure route is poor staging. If you start too coarse, each pass must remove deeper scratches. Edges see higher local removal rates, so they “catch up” faster and roll before the flats are uniformly refined. Conversely, if you stay too fine for too long trying to erase a defect, you’ll dwell and round by time under load. Progression choice is not merely about finish appearance; it’s about matching stock removal to geometry preservation.
Finally, contamination and film build play roles. Dust nibs under the sheet create point loads; dried slurry in wet sanding acts like a rogue coarse grit. Both amplify edge risk. The cure is a clean sheet, clean part, and a flat support that doesn’t broadcast debris.
Choosing rigid backers and media
Your block is your geometry. If it’s dead flat and rigid, your surface will be too. Preferred backers for preserving crisp corners:
- Float glass or granite surface plate: For lapping operations where the workpiece moves on a fixed abrasive. Ideal for tiny micro-chamfers or flattening mating faces.
- Machined aluminum or steel blocks: Light, durable, and dimensionally stable; excellent for guided strokes. A 1-2-3 block or ground parallel makes a superb backer.
- Hardwood blocks (hard maple, beech): Acceptable if jointed flat and sealed; edges hold up better than softwood. Use only when metal blocks are impractical.
Backer edge geometry matters. A truly sharp-edged block risks catching and cutting into adjacent planes; a tiny 0.1–0.2 mm arris prevents snagging without telegraphing a radius onto the work. For extremely crisp design intent, use a block that’s slightly narrower than the target facet so the edge of the block never overhangs the adjacent plane.
Abrasive selection is the other half:
- Film-backed abrasives: Polyester- or Mylar-backed sheets (often called “microfinishing films”) hold flatness better than paper. They resist humidity curl and distribute load more evenly. Excellent from P400 through P5000 equivalents.
- Stearated papers: Useful in woods and primers to reduce loading, but prefer stiff paper weights (C–E weight) and adhere them to a rigid block to eliminate flex.
- Diamond sheets or stones: For hard tool steels, ceramics, and abrasive composites, diamond maintains cut on dead-flat plates without edge roll-off. They also shine when preserving small bevels.
- PSA vs. clamp: Pressure-sensitive adhesive sheets on a block provide full-face adhesion—no “baggy” sections that wrap around corners. If you must wrap, limit wrap depth to less than 3 mm and keep the working edge away from geometrical boundaries.
- Interface pads: In almost all edge-preservation scenarios, avoid foam pads. If an interface is necessary for texture blending, choose very thin, firm pads (e.g., 1 mm hard cork) and stay well away from the corner.
Grit strategy should reflect removal vs. refinement. For machining marks around 20–30 µm Ra, start P220–P320 on a rigid backer. For primer or resin ridges under 10 µm, start P400–P600. Progress in 1.5–2× steps (e.g., P320 → P500 → P800 → P1200). Skipping too far risks chasing deep scratches with excessive dwell; moving too slowly wastes time and invites rounding. Keep a sharp pencil and dye (layout fluid) at hand—color the edge you must protect and use the witness line to verify you’re not crossing it.
Integrating hand sanding with edge control
Preserving a crisp edge is a workflow, not a trick. It starts with registration, continues with disciplined strokes, and ends with verification. Here’s a high-reliability sequence for hand sanding that keeps geometry honest:
- Mark and mask: Use a scribe or layout dye to define the edge you’re protecting. Optionally apply a 6–10 mm strip of thin poly tape along the adjacent face as a tactile no-go.
- Register the backer: Place the block fully on the target plane with zero overhang past the edge. If the facet is small, use a narrower block or an auxiliary fence (e.g., a parallel clamped to the work) to keep the backer constrained.
- Control the vector: Sand parallel to the edge or at a shallow angle into the plane, never perpendicularly across the ridge. Use pull strokes when possible—the abrasive exits at the edge rather than entering it.
- Limit dwell: Count strokes per zone. For example, four passes, lift, clean, rotate 90°, re-ink the edge, and reassess. Advance grits once the scratch field is uniform, not perfect.
- Verify with light: Use low-angle raking light to read plane continuity. The moment you see the bright line of the edge dulling uniformly, stop; you’ve reached the limit.
Actionable tips for edge-safe hand sanding:
- Keep the abrasive face proud of any wrapped edges by at least 5 mm; avoid wrapping entirely on critical edges.
- Use firm PSA-backed film on a narrow block to target small facets without trespassing onto adjacent planes.
- Draw a pencil hatch near the edge; if it disappears before the field is even, your pressure distribution is edge-biased—reset and lighten.
- Switch to wet sanding only after the geometry is set dry; slurry can hide rounding until it’s too late.
- Clean sheets often with a crepe block; loaded grit spikes pressure and cuts unpredictably at boundaries.
For woods, consider pre-sealing end grain with a light shellac wash before final passes; it evens cut rates at edges. For metals, de-burr mechanically first—burrs will snag and falsely suggest a “sharp” edge. For SLA or DLP prints, cut support nubs flush with a sharp chisel or scraper, then plane the area with a rigid block and P400 film. Avoid foams; they track into support craters and soften intended edges.
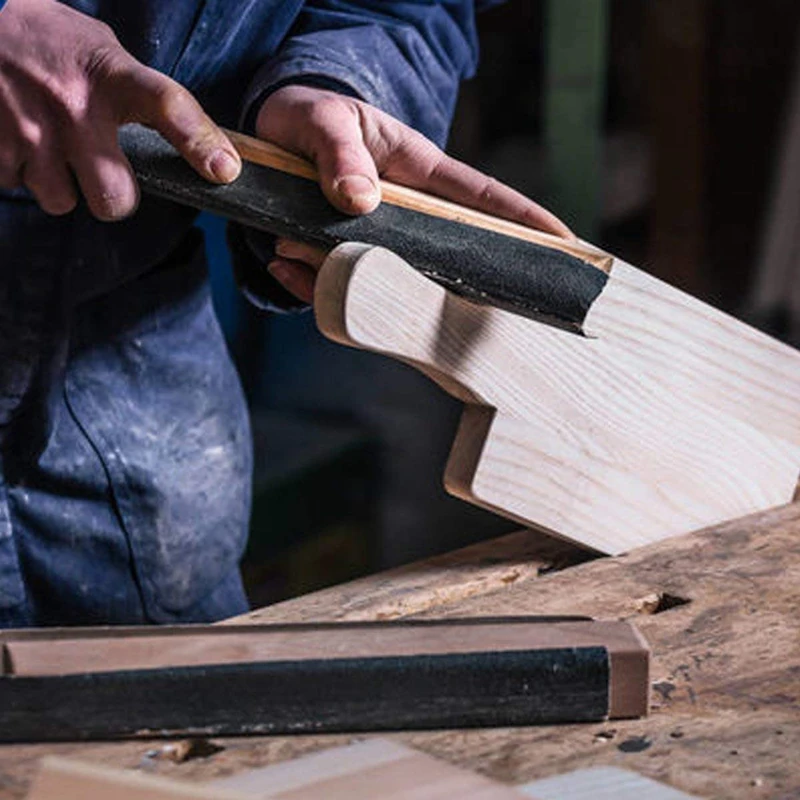
Stroke mechanics and pressure mapping
Think of your hand, block, and abrasive as a load-distribution system. Your goal is to flatten the pressure map. Two controls matter most: contact area and moment control.
- Contact area: A wider block reduces pressure per unit area for a given force. On narrow facets, reduce force rather than block width to maintain stable registration without overhang.
- Moment control: If your wrist cocks, you introduce a torque that pivots the block into the edge. Keep the wrist neutral; pin elbows to torso for repeatable vector control. Use two hands on longer blocks to cancel roll.
Leading vs. trailing edges also change cut dynamics. A push stroke drives grit toward the edge—more aggressive and risky. A pull stroke exits at the edge—gentler and safer. On delicate geometry, bias toward pull strokes with light force. Angle the stroke so that the last 2–3 mm of travel reach the corner; don’t start at the corner.
Manage boundaries consciously:
- Use overhang avoidance: Never allow the block to extend past the edge you’re protecting. If the plane is smaller than your block, change blocks.
- Intentionally micro-chamfer when appropriate: If the design tolerates a 0.05–0.1 mm arris, create it early with a single, controlled pass at P400. Then treat that micro-chamfer as a “do not increase” feature while finishing the adjacent planes. It stabilizes edges and resists accidental rounding.
- Clamp a sacrificial stop: On long workpieces, a straightedge clamped parallel to the edge acts as a fence for the block; ride the fence, never the corner.
In high-build coatings or primers, be mindful that film thickness piles at edges during spraying. Hand sanding there removes that pile first—easy to overcut. Reduce pressure at edges by starting mid-field and fading toward the boundary.
For rigid printed parts and sharp metal features, tool control has safety implications. Edges are unforgiving; slips can injure or gouge. According to a article, handling rigid components demands deliberate support to prevent sudden releases and cuts—advice that transfers directly to edge-safe sanding setups. Stabilize the workpiece, forearm supported, and never chase a moving part.
Finally, inspect often. Wipe away slurry or dust, reset your witness marks, and reorient under a different light angle. The sooner you see drift, the easier it is to correct without overworking the edge.
Workflow examples and grit progressions
Abstract principles become concrete with disciplined sequences. Here are three field-proven workflows tailored to common materials and geometries.
Hardwood cabinet door bevel (maple):
- Goal: Leave a crisp 45° bevel between rail/stile faces with a uniform satin finish.
- Setup: 25 mm-wide aluminum block with PSA-backed P320, P500, P800 film. Layout dye on the arris between bevel and face. Tape mask on the adjacent flat as a tactile barrier.
- Process: Start with P320. Register the block fully on the bevel, zero overhang. Pull strokes along the length of the bevel, four passes per 300 mm, then rotate the panel. Re-ink between grits. Switch to P500 once milling marks are uniformly matte, then P800 for final. If end grain at corners is slightly proud, pre-seal with a quick shellac swipe, then make two light passes at P500 only in those zones. Total dwell per edge under two minutes; edges remain crisp because no stroke crosses the arris.
SLA resin enclosure seam removal:
- Goal: Blend a 0.1–0.2 mm seam and support marks on a flat face without softening the edge radius spec.
- Setup: 6 mm-thick float glass plate as the abrasive support; PSA P400, P800, P1200 films. Sharp chisel or carbide scraper for initial nub removal. Pencil witness on the edge radius.
- Process: Shear off nubs flush with the scraper, held nearly parallel to the face. Lay P400 film on glass; move the part on the abrasive, not vice versa, keeping the seam-centered and the edge off the abrasive by 5–8 mm. Use short, straight strokes; do not let the film contact the edge radius. When the seam fades uniformly, switch to P800, then P1200. For localized defects near edges, switch to a narrow (10–12 mm) aluminum bar with P800 to spot-sand away from the edge. Final check under raking light; if the edge shine dulls, you’ve wandered—stop and reset.
Cast aluminum gearbox cover face and gasket land:
- Goal: True the gasket land and deburr without rolling the external silhouette.
- Setup: Granite plate with P220 and P400 PSA film for lapping the gasket land; separate 20 mm-wide steel backer with P320 for deburring exterior silhouette. Blue layout fluid on both the land and the outer edge.
- Process: Lap the gasket land on the granite with figure-eight motions until contact is uniform (blue disappears evenly). Switch to P400 for finish. For the exterior silhouette, use the steel backer and P320 with very light pull strokes just to break burrs—one pass only. Avoid longitudinal strokes that ride off the silhouette onto air; that pivot causes rounding. If corrosion pits remain, spot them with P320 on a 6 mm bar, not a wrapped sheet. Finish with a brief P600 pass only on the land if required for sealing. The sharp external line reads crisp because it never saw a wrapped abrasive.
In all cases, match your grit steps to the depth of the preceding defects and lock in a rule: no grit crosses the protected boundary. When in doubt, reduce pressure, shorten strokes, and verify with fresh witness marks at each transition.
Hand Sanding Basics — Video Guide
Gator Finishing’s short guide to basics demonstrates block selection, sheet handling, and stroke control—core moves that determine whether you cut a plane or roll an edge. While it’s a general introduction, the segments on using sanding blocks and reading scratch patterns map directly to edge-safe workflows.
Video source: Hand Sanding Basics
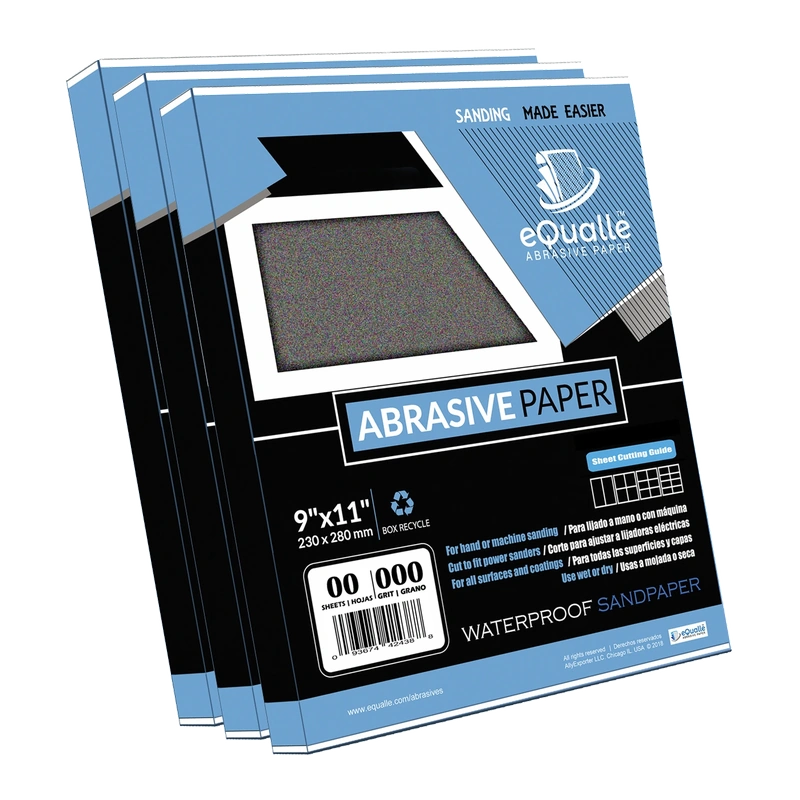
150 Grit Sandpaper Sheets (50-pack) — 9x11 in Silicon Carbide Abrasive for Wet or Dry Use — Balanced medium grit for surface preparation and between-coat sanding. Smooths minor imperfections in wood, paint, or primer. Works equally well for wet or dry applications in both DIY and professional projects. (Professional Grade).
Frequently Asked Questions (FAQ)
Q: What backer stiffness works best to preserve corners on wood vs. metal?
A: For wood, a machined aluminum block or sealed hard-maple block works if kept flat; avoid any foam. For metals and rigid plastics, prefer steel or aluminum blocks and, for lapping, float glass or a granite plate. The stiffer the substrate, the flatter the pressure map—and the safer the edge.
Q: Should I cut a tiny chamfer before finish sanding?
A: If the design allows, a controlled micro-chamfer (0.05–0.1 mm) created early with P400 on a rigid block stabilizes the edge and resists accidental rounding. Then treat that chamfer as a protected feature—do not increase it during subsequent grits.
Q: How do I prevent edge rounding when wet sanding automotive primer?
A: Set geometry dry first with P400–P600 on a rigid block. When switching to wet, flood generously and clean often to avoid slurry loading. Keep the block fully on the panel, reduce pressure near edges, use pull strokes, and never let the abrasive wrap over panel gaps or body lines. Consider a thin tape mask as a tactile stop.
Q: What grit should I start with on 3D printed resin parts after removing supports?
A: After shearing supports flush with a sharp scraper, start with P400 film on a glass plate to plane faces while keeping edges off the abrasive. If layer lines or ridges are deeper, drop to P320 briefly. Progress to P800–P1200. Avoid sponges; their compliance dives into support craters and softens edges.