
Precision molding sanding with profile grips
It’s 6:40 a.m., quiet in the shop except for the hum of the dust extractor spooling up. Yesterday’s crown sits on the bench, perfect in line and cope, but the surface tells a different story—compressions from a clamp, a faint mill mark telegraphing across a quirk bead, a bit of raised grain where the primer bloomed. You run a fingertip over the ogee, stop at the fillet, and feel the transition that will glare back once the topcoat lays down. Now’s the moment that separates crisp joinery from a professional finish: precise molding sanding that preserves the geometry you worked so hard to cut. Not with a random orbit that flattens coves, not with a folded sheet that rounds arrises, but with profile sanding grips matched to the exact contours.
There’s a pace to detailed trim work that’s part choreography and part ritual. You reach for a labeled tray: 1/4" bead, 3/8" cove, 1/2" round-over, Roman ogee inserts—each grip milled or cast to mirror a radius or compound curve. The right grip finds the profile like a key in a lock. Pressure is uniform, apexes protected, and the abrasive actually cuts rather than skids. You’re not “touching up”; you’re engineering surface quality—orienting scratch patterns with the grain, staging grit progressions to avoid deep valleys, and managing dust to keep faces flat. Five minutes per stick could be the difference between a finish that sings and hours of rework after the first coat reveals every flaw. The goal today isn’t speed; it’s control—repeatable, evidence-based steps to bring complex trim to a finish-ready state without deforming the profile. That starts with the right grip on the right curve, every time.
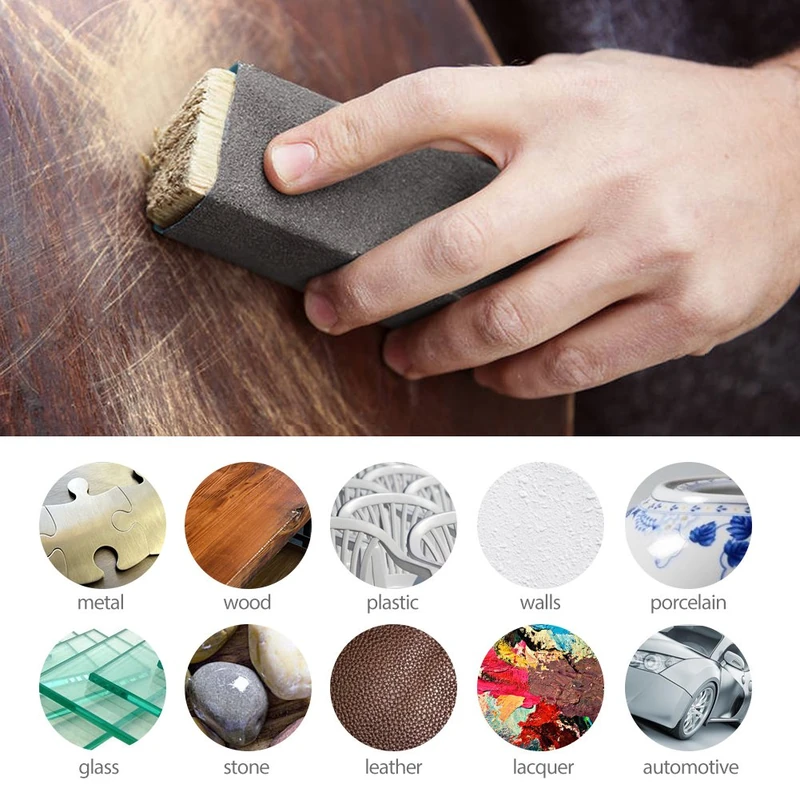
Quick Summary: Match profile grips to molding contours, pair with the right abrasives, and run a disciplined sanding workflow to achieve finish-ready trim without deforming details.
Why Profiles Demand Matched Grips
Profiles concentrate geometry into tiny transitions—quirks, fillets, beads, and coves—where even minor over-sanding is obvious. A flat block contacts only the highest points of a curved profile, so pressure spikes at apexes and collapses radii; conversely, soft foam sneaks into valleys and rounds edges. Matched grips solve this by equalizing contact pressure along the curve. With a mirror-image backer, abrasive grains engage the surface at a consistent angle, cutting instead of burnishing and preserving the intended cross-section.
Material behavior amplifies the need for control. MDF skins crush if you point-load them with a finger; soft maple will dish at earlywood bands; red oak’s open pores trap debris that then scours adjacent high spots. A matched grip distributes load, keeping microstructures intact. On painted trim, preserving sharpness is everything—primer fills shallow valleys, but it can’t rebuild an erased fillet. On clear finishes, directional scratches show through; grips maintain orientation so scratch vectors align with visible grain whenever possible.
Geometry matters even more at inside corners and compound transitions. A bead-to-cove junction, for example, has a neutral line where the material is most vulnerable to rounding. A grip that spans both radii keeps you off that neutral line, while a pair of modular inserts lets you attack each radius independently without cross-contaminating edges. For long, straight runs, a slightly longer grip stabilizes stroke length and reduces facetting. For curved crown in situ, a shorter, more compliant grip combined with thin film abrasives lets you work near obstacles without levering.
Ultimately, matched grips are about process control: consistent pressure, controlled scratch formation, and geometric fidelity. Without that control, you end up chasing defects created by the sanding itself—lost edges, dished coves, and high-contrast sheen discontinuities that topcoat will amplify.
Dialing in molding sanding with profile grips
Start by identifying the exact radii and transitions in your molding. A contour gauge provides a quick read, but for precision, use calipers and radius gauges to map beads and coves. Sort your grips accordingly: hard backers (wood, dense urethane) for radii ≥ 6 mm where shape must be preserved under load; microcellular foam or rubber-faced inserts for tight coves and ogees where conformity aids full contact without point-loading. Label each grip with radius and intended grit range to prevent cross-use.
Grip preparation is as important as the abrasive. Wrap the abrasive taut with minimal overlap to avoid a double-thickness ridge that tracks into the work. For interchangeable systems, cut abrasive strips to exact length and pre-crease them so seams sit in low-stress zones. PSA-backed films excel here—they maintain shape and resist edge lift. For custom one-offs, cast a negative with quick-set urethane or epoxy putty pressed against a clean offcut; true the backer flat on a jointer or abrasive plate so your hand pressure translates evenly.
Run a disciplined progression. On raw hardwood: 120 to remove mill marks and bruises; 150 to refine; 180 for clarity; 220 sparingly to avoid polishing early. On MDF or primed trim: 180 or 220 only—coarser grits can cause fuzzing or cut through primer. Keep strokes short and aligned with the profile’s tangential direction, not across transitions. Use raking light and pencil witness marks across beads and coves; sand until the marks just vanish uniformly, which indicates complete, even contact.
Finally, manage heat and loading. Curves concentrate heat; pause between passes and dust off frequently. If you see shiny burnish zones, you’re either pressing too hard, the abrasive is dull, or the grip isn’t matching. Correct the cause, don’t just escalate grit.
Abrasive Selection for Intricate Curves
Not all abrasives behave the same on curves. Backing stiffness, grain type, and coat weight determine cut rate, scratch uniformity, and clogging. Film-backed abrasives (polyester films) offer the flattest, most uniform scratch pattern and excellent edge wear—ideal for beads and coves where paper edges fray and gouge. Paper backings (C-weight to F-weight) are fine for larger radii but can crease on tight profiles, creating lines that telegraph under finish. Cloth backings excel for strip “flossing” techniques around spindles and tight inside corners.
Grain selection matters. Aluminum oxide is a reliable generalist for raw wood. Silicon carbide cuts cooler and breaks down to sharper points, making it useful on primer and between coats, but it loads quickly on resinous woods. Ceramic and precision-shaped grains cut aggressively at lower pressure; on delicate profiles, they can be overkill unless you are correcting defects in dense hardwoods. Stearated, open-coat variants reduce loading on paint and primer but can smear under heat—use light pressure and keep the surface clean.
Nonwoven abrasives (maroon/gray pads) are excellent for denibbing after primer and scuff-sanding topcoats, but they follow contours so well they can round edges—use them away from crisp details. Micro-finishing films (400–800 grit) align scratch patterns for waterborne topcoats that highlight swirl. Maintain fresh abrasives; dull grains burnish and raise sheen without cutting, masking defects until finish.
Dust extraction directly influences abrasive life. A simple downdraft mat or hose at the bench face reduces clogging. On-site, a brush and vacuum after each grit change keep debris from turning into random scratches. And keep abrasives segregated—primer-only strips, raw-wood strips, and between-coats strips—so embedded contaminants don’t migrate. According to a article.
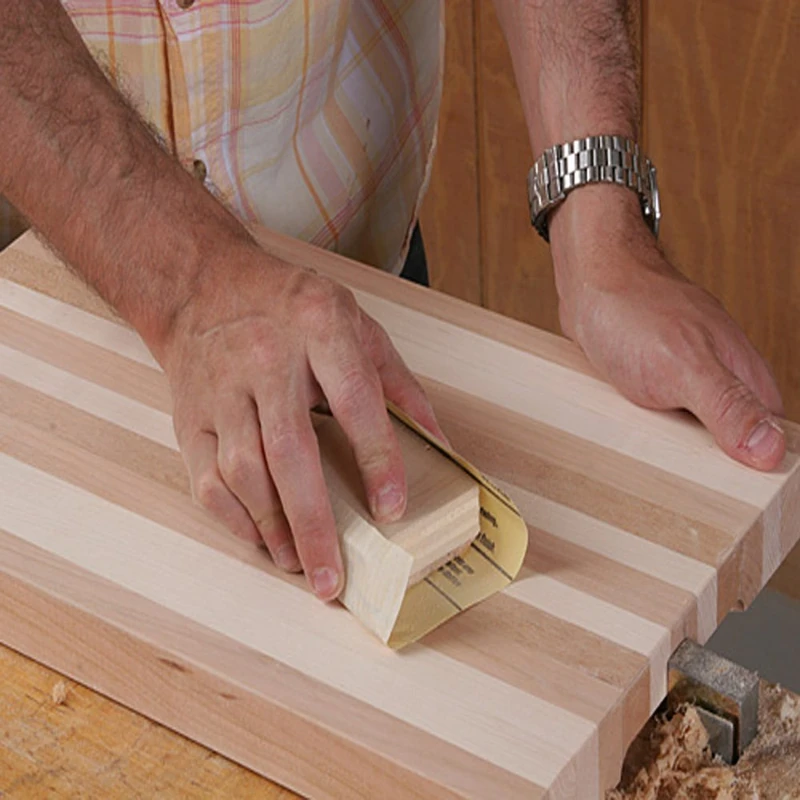
Workflow: From Nicks to Finish-Ready
A predictable workflow prevents backtracking and guards against over-sanding. Map defects under raking light and mark them with a wax pencil. Triage: compressions, chatter, glue squeeze-out, and primer nibs each need a targeted approach.
- Step 1: Geometry protection. Mask adjacent apexes with low-tack tape, especially at quirks and fillets. This sets a “do not cross” line and preserves silhouette.
- Step 2: Defect removal with matched grips. Use the smallest matching radius that fully contacts the defect zone; cut with the first effective grit only as long as needed to remove the issue, then immediately move up to refinement grits.
- Step 3: Transition blending. Where a bead meets a cove, switch grips rather than trying to bridge transitions in one pass. Feather by reducing stroke amplitude as you approach the junction.
- Step 4: Primer and denib. If painting, spot-prime sanded-through areas, then denib with gray nonwoven or 320 film on a compliant insert, staying off sharp edges.
- Step 5: Verification. Wipe with naphtha or alcohol to simulate finish sheen and reveal scratch orientation; reassess under raking and cross-light.
Actionable tips:
- Use pencil witness lines perpendicular to the profile. Stop as soon as all lines disappear evenly—this prevents overcutting low spots.
- For tight coves, “floss” with a narrow cloth-backed strip backed by a small dowel that matches the radius; pull alternately from each side to keep edges crisp.
- Pre-condition MDF edges with a thin shellac or waterborne sanding sealer before final passes; this reduces fuzz and extends abrasive life.
- Maintain a torque-neutral grip. If your hand twists the backer, you’re point-loading; flatten your wrist and let the backer glide.
- Control temperature. If the abrasive feels hot to the touch, rotate to a fresh zone or pause; heat burnishes primer and collapses MDF fibers.
By keeping decisions binary—this grip/this radius, this grit/this defect—you eliminate ambiguity. The result is a clean, preserved profile that requires minimal film build to look flawless.
Measuring Quality: Flatness, Sheen, Dust
Quality in molding sanding is measurable, not just “by feel.” Start with geometry checks. Cut a simple contour template from cardstock or 3D-print a negative of the intended profile; lay it against the work at random intervals. Look for light gaps at apexes and flats where curves should be continuous. A feeler gauge (.05–.10 mm) slipped between template and work quantifies dish-out.
Sheen uniformity is the next indicator. After the last grit, mist the surface with alcohol and hit it with raking light at 20–30 degrees. A uniform matte indicates consistent scratch depth; bright bands or tiger-striping mean mixed scratch orientations or burnished zones. On painted work, a quick scuff with 320 film on a compliant grip homogenizes sheen without rounding.
Dust control directly correlates to finish success. Embedded dust becomes craters and fisheyes; airborne dust settles into wet film. Vacuum between each grit and after any nonwoven use (they shed). Wipe with a clean, lint-free cloth dampened with water or alcohol depending on finish chemistry—avoid mineral spirits before waterborne coatings.
Track abrasive performance. Note how many linear feet you cut before the scratch pattern dulls; if life is short, switch to open-coat or a different grain. Inspect spent strips: burned edges mean heat and too much pressure; loaded centers mean insufficient dust evacuation or too soft a backer concentrating debris in the valley.
Finally, confirm finish readiness with a controlled test: apply a small patch of the intended finish to an offcut prepared the same way. If grain raise appears, add a light pre-wet and re-sand step at one grit lower. If witness lines show through clear coats, extend your progression by a single step (e.g., 180 to 220 to 320) but only where needed. The goal is to arrive at a repeatable endpoint where geometry is preserved, scratch pattern is aligned, and the surface is clean and thermally stable.
Molding Sander Kit! — Video Guide
Ethan from EthAnswers walks through a Stockroom Supply molding sanding kit, demonstrating how its brush-style head and interchangeable abrasives conform to trim profiles while keeping edges intact. He contrasts the controlled cut of the brush head with the tendency of flat pads to flatten coves or round beads, highlighting where the kit outperforms typical shop sanders.
Video source: Molding Sander Kit! How & Why Does It Work To Sand Your Trim? EthAnswers
320 Grit Sandpaper Sheets (50-pack) — 9x11 in Silicon Carbide Abrasive for Wet or Dry Use — Fine finishing grit for sanding between coats of paint, primer, or lacquer. Provides smooth, even results for woodworking, automotive, and precision finishing. Works efficiently for wet or dry applications. (Professional Grade).
Frequently Asked Questions (FAQ)
Q: How do I make a custom grip if I don’t know the molding’s exact radii?
A: Press a contour gauge to capture the profile, then transfer key arcs to a template and measure with radius gauges. Cast a negative with fast-set urethane or shape hardwood on a spindle sander to match the measured arcs. Verify fit with pencil witness marks before sanding the actual work.
Q: What grit sequence is best for pre-primed MDF versus hardwood trim?
A: On pre-primed MDF, stay at 180–220 for shaping defects and 320 between coats to avoid cutting through. On raw hardwood, start 120/150 to remove mill marks, then 180 and a light 220. Avoid over-polishing early; higher grits can close pores and cause adhesion or sheen mismatch.
Q: How do I prevent rounding crisp edges during denibbing between coats?
A: Use a matched profile grip with a compliant face and 320–400 film. Mask apexes with low-tack tape, keep strokes aligned with the profile, and use minimal pressure. Avoid nonwoven pads on sharp details—they conform too aggressively and can soften edges.
Q: When should I switch from hand grips to a brush-style molding sander?
A: Use powered brush heads for long, consistent runs where geometry is repetitive and access is clear. Hand grips excel at terminations, compound transitions, and repair zones needing precise, localized control. Many workflows combine both: power for bulk, grips for edges and details.
Q: My abrasives load immediately on painted trim. What should I change?
A: Move to open-coat, stearated film or paper, reduce pressure, and improve dust extraction at the point of contact. If paint is soft, allow more cure time; hot, gummy films will load any abrasive. Rotate to fresh zones frequently and keep the work surface clean between passes.